Save results into icechunk
Each save into icechunk is a commit, so you can save a new result over an old one and still open the old one by its snapshot ID.
- The example segments nuclei in one of Fiji's sample images with StarDist, saves the image and the segmentation into a local repository, reruns with new settings and saves over the result, then reopens the first result.
- The save dialog's Overwrite option replaces what the branch holds at a path, but earlier snapshots still hold the replaced data.
What you need
- Fiji set up as in Use in Fiji. The icechunk-n5-universe jar adds File > Save As > icechunk....
- Appose Python scripting, which ships with Fiji on the Fiji-Latest update site, for StarDist. Example: segment nuclei with StarDist describes how it runs.
No account or cloud storage is needed: the repository is a folder on your computer.
Open the sample image
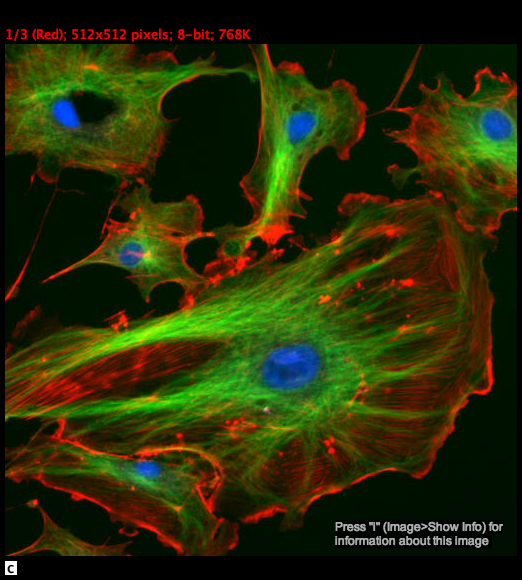
Choose File > Open Samples > Fluorescent Cells. The image is 512 × 512 pixels with three 8-bit channels: F-actin in red, tubulin in green, and nuclei stained with DAPI in blue.
Save the image into a new repository
- With the image active, choose File > Save As > icechunk....
-
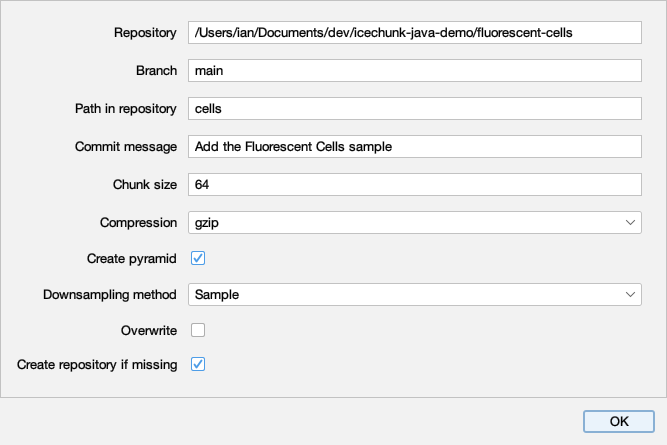
Fill in the dialog:
Field Value Repository the full path of a folder that does not exist yet, such as /Users/you/icechunk-demo/fluorescent-cellsBranch mainPath in repository cellsCommit message Add the Fluorescent Cells sampleCreate repository if missing ticked Leave the other fields at their defaults.
-
Click OK.
The command creates the repository, writes the image as OME-Zarr at cells with a pyramid of four resolution levels,
and commits it. Fiji's status bar then shows the new snapshot's ID, such as
Committed snapshot TJ5YYYYAW5EVTFQA67TG to main, and the Console (Window > Console) logs it. Your IDs will
differ from the ones on this page.
Create repository if missing creates a repository only at a local path, and it is unticked again the next time the dialog opens, so that a mistyped path fails instead of creating a second repository.
Segment the nuclei
-
Choose Image > Duplicate... and set:
Field Value Title DAPIDuplicate hyperstack ticked Channels (c) 3StarDist's fluorescence model takes one nuclear-stain channel, and channel 3 is DAPI.
-
Open the Script Editor (File > New > Script...) and choose Templates > Appose > StarDist cellcast.
- With the
DAPIwindow active, click Run, keep the default parameters, and click OK.
The result opens as a 16-bit image named labels, with each nucleus a different integer. Choose
Image > Lookup Tables > glasbey on dark to colour them. This run finds 21 objects. Besides the nuclei, the
model marks a small speck in the middle of the image and the letters of the note in the bottom right corner, which is
part of the sample's pixels.

Save the labels
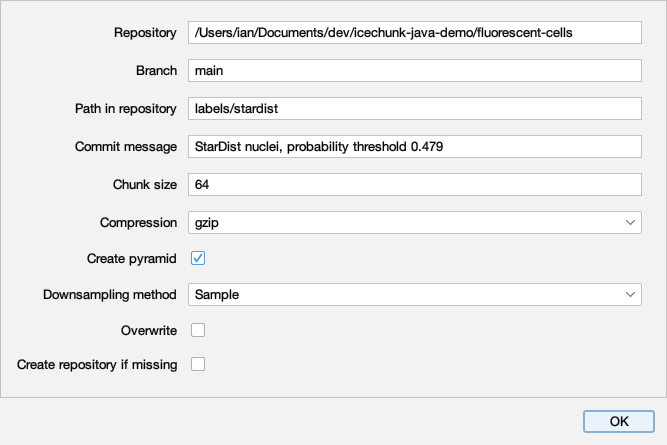
With labels active, choose File > Save As > icechunk... again. The dialog remembers the repository and branch.
Set Path in repository to labels/stardist and the commit message to
StarDist nuclei, probability threshold 0.479, and click OK.
This is the repository's second commit. Note its snapshot ID from the status bar or the Console; this run's was
CQSG7B6CA1BJCMHXWCCG.
Rerun with a higher threshold, and overwrite
- Make
DAPIthe active image, switch to the StarDist_cellcast.py tab in the Script Editor, and click Run. -
Set Prob_threshold to
0.7and click OK.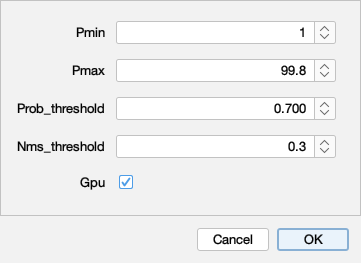
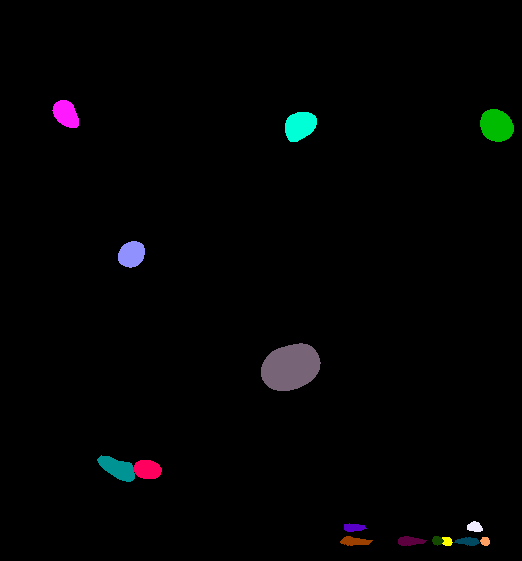
With the higher threshold, StarDist keeps only objects it is more confident of: 15 instead of 21. The speck and some of the letters are gone.
-
With the new
labelsimage active, choose File > Save As > icechunk..., keep the pathlabels/stardist, set the commit message toStarDist nuclei, probability threshold 0.7, tick Overwrite, and click OK.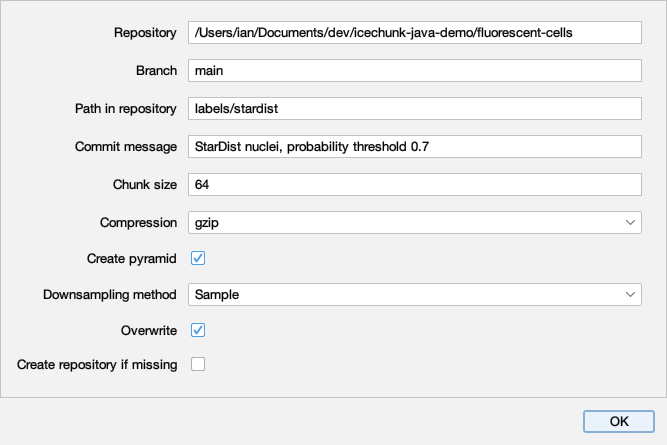
Without Overwrite, the command refuses to replace what is already there and commits nothing:
labels/stardist already exists on branch main; check Overwrite to replace it. With it, the command deletes
labels/stardist and writes the new labels in its place, in one commit. main now holds three commits on top
of the repository's initial snapshot: the image, the first labels, and the second labels.
Open the earlier labels
The labels from the first run are no longer on main, but the snapshot from the second commit still holds them. Open
them by that snapshot's ID:
- Choose File > Import > HDF5/N5/Zarr/OME-NGFF ....
-
Paste the repository's path, then
|icechunk://, the snapshot ID, and the node path:/Users/you/icechunk-demo/fluorescent-cells|icechunk://CQSG7B6CA1BJCMHXWCCG/labels/stardist -
Click Detect datasets. The tree lists the four resolution levels,
s0tos3. - Select
s0, the full-resolution array, and click OK.
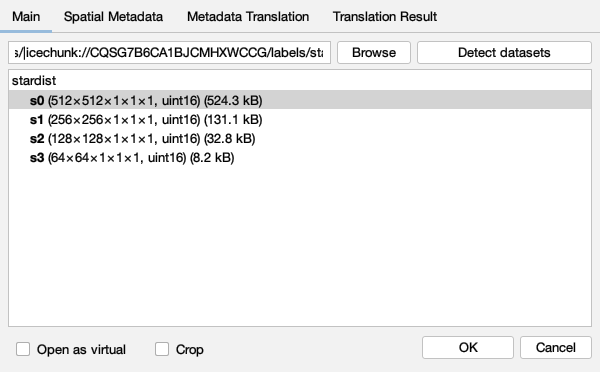
The image that opens is the first run's result, with all 21 objects, pixel for pixel the image saved in the second commit. Colour it with glasbey on dark to compare it with the current one.

Other versions open the same way:
| URL after the repository path | Opens |
|---|---|
\|icechunk://branch.main/labels/stardist |
the labels on main now, from the second run |
\|icechunk://CQSG7B6CA1BJCMHXWCCG/labels/stardist |
the labels from the first run |
\|icechunk://TJ5YYYYAW5EVTFQA67TG |
the repository as the first commit left it: cells only, no labels |
Open from a URL describes the URL syntax, including tags.